Getting Started
Getting Access
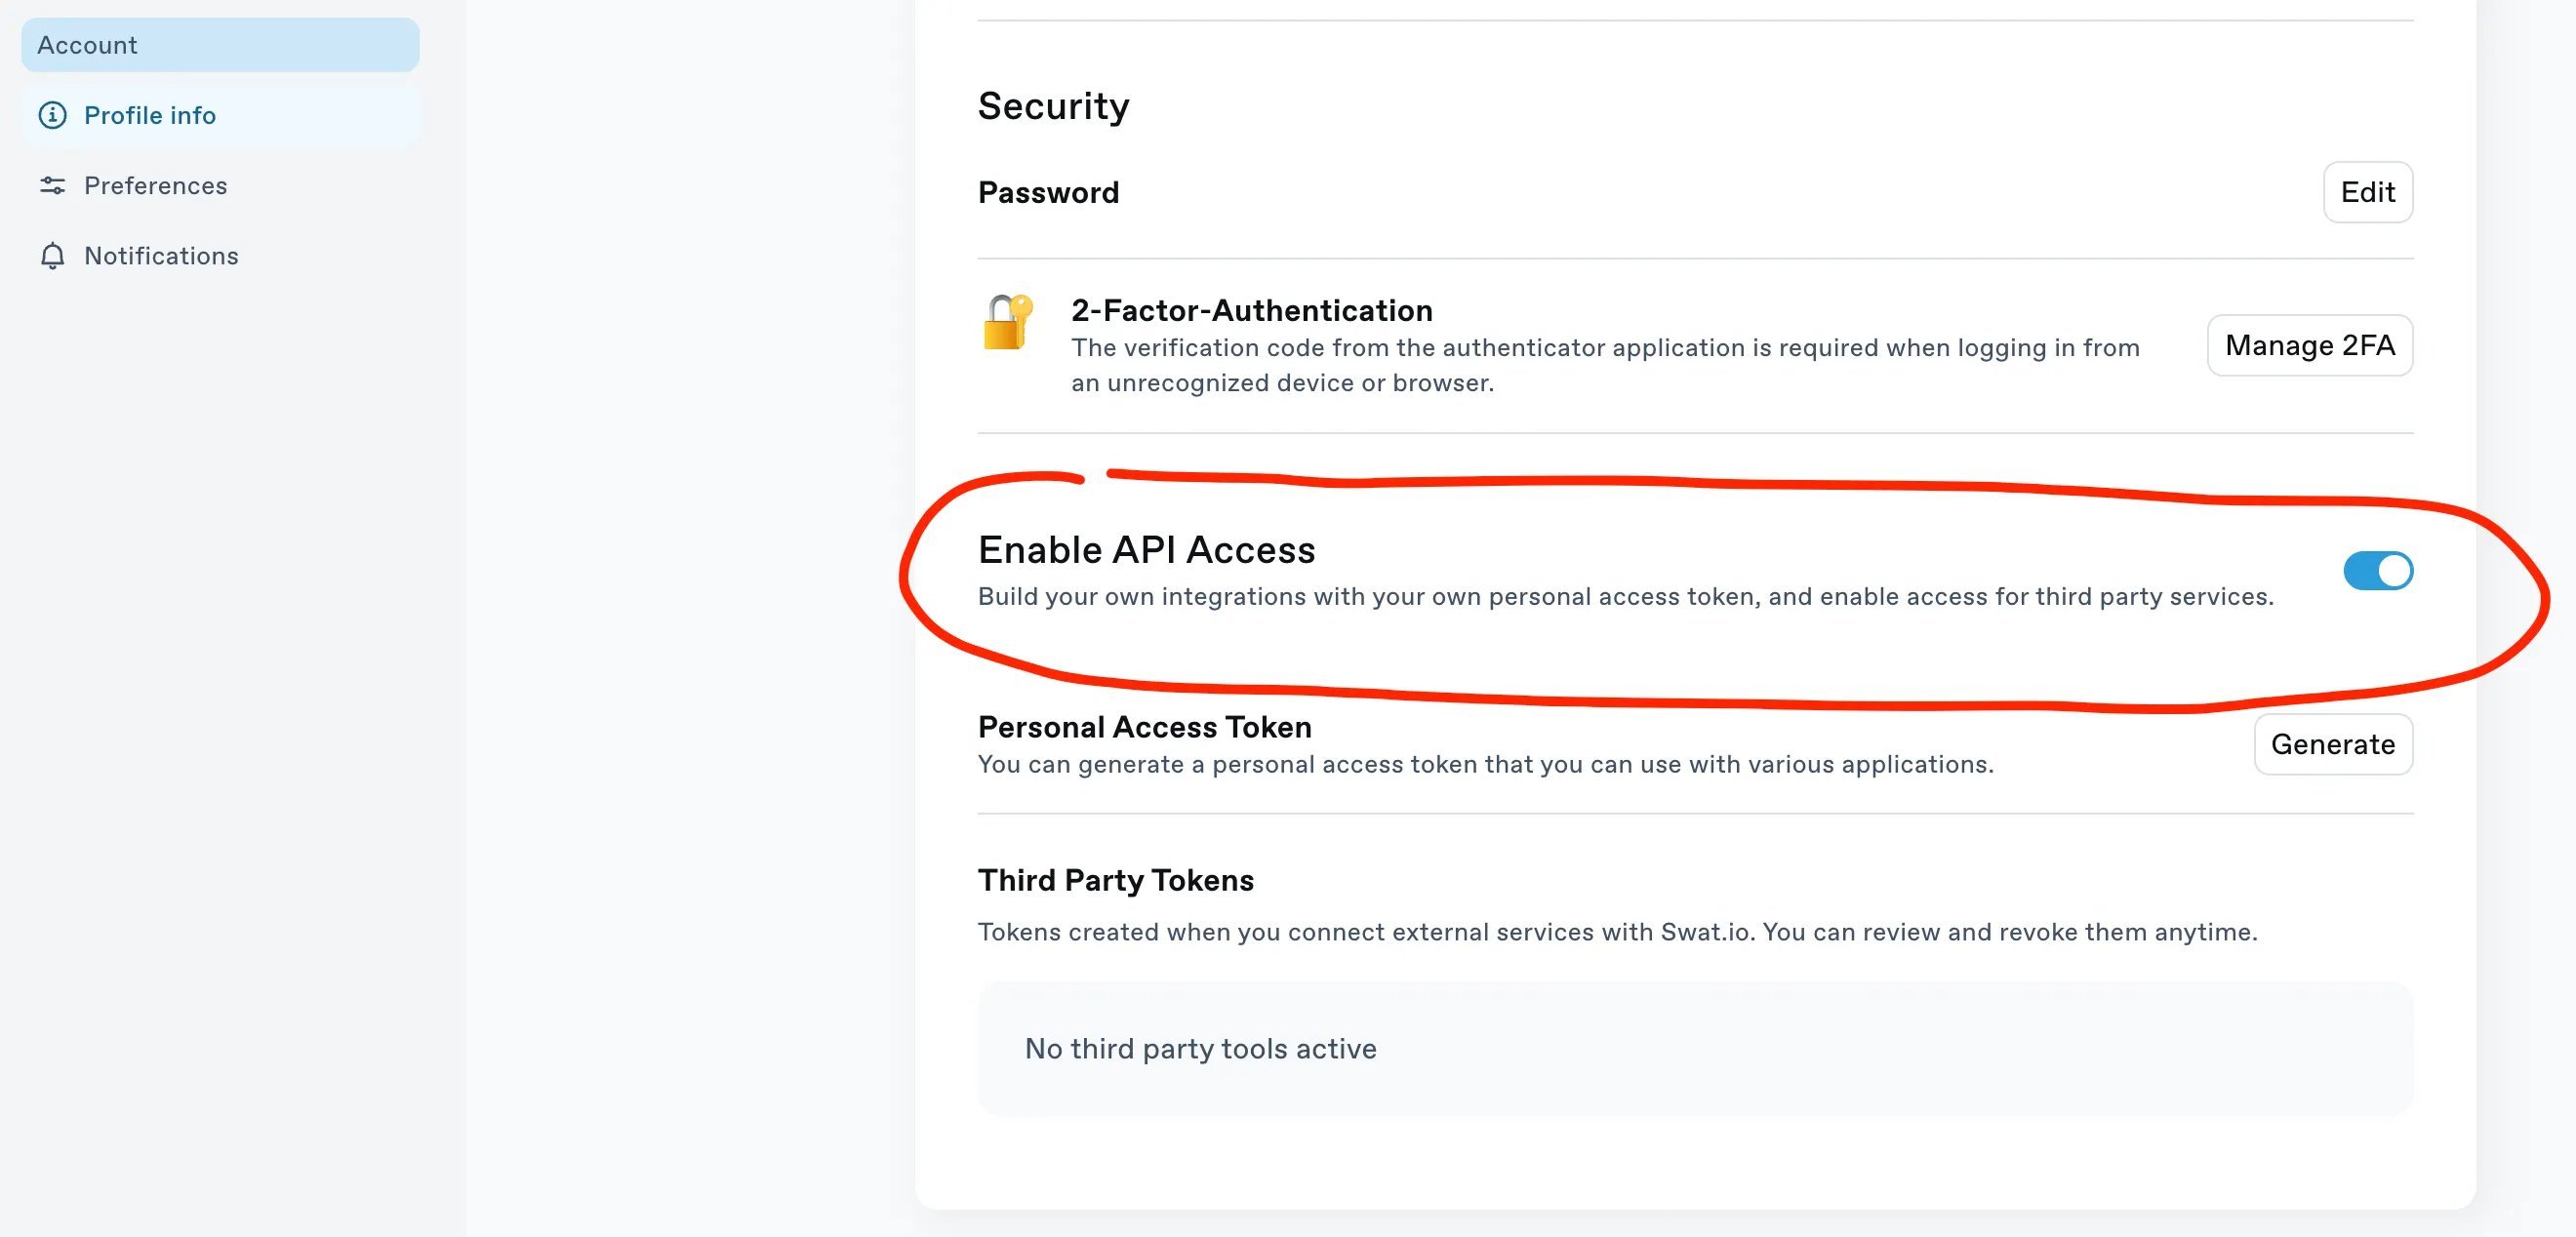
To use our API, you need to enable the API access within Swat.io. This is done in user settings.
Existing Access Tokens
Should you have received a token in the past, through our manual API request access flow, that token is still valid. You can go to the settings to generate a new one if you like, but the API access is already enabled for your account.
Using the token
API access works strictly on a user token level. A token is provided for a user, not per workspace or company.
Tips
If you plan to use the API for a lot of custom tooling and processes, we recommend to create a separate user account. That account can be leveraged for general API flows. With a seperate account it is easier to identify which actions were taken through the API.
Sharing a token
If you need to share a token securely with the customer, please use a secure password sharing tool.
Your first API call
Once you have a token, verify it works with a quick whoAmI query. Replace <YOUR_TOKEN> with your actual token:
curl -s \
  -X POST \
  --location "https://graphql.swatio.app/api" \
  -H "Content-Type: application/json; charset=UTF-8" \
  -H "Authorization: Bearer <YOUR_TOKEN>" \
  -d '{"query": "query whoAmI { me { id email first_name last_name } }", "variables": null}'
A successful response looks like this:
{
  "data": {
    "me": {
      "id": "1234",
      "email": "developer@example.com",
      "first_name": "Jane",
      "last_name": "Developer"
    }
  },
  "meta": {
    "x-swatio-trace-id": "abc123..."
  }
}
If you see your user details, you're all set. Head over to the API Overview to start working with workspaces, channels, and posts.